
If you run one of the half a million websites that have Ninja Forms installed you may be wondering if there's a way to integrate your form with ConvertKit, the new, powerful and very intuitive marketing email service provider for professional bloggers.
Connecting Ninja Forms with ConvertKit is simple and only takes a few minutes to set up using a free third party plugin from the wordpress.org plugin repository, which we configure to send the form submission to ConvertKit.
Here are my step-by-step instructions for how to integrate Ninja Forms with ConvertKit, so that the sender is automatically subscribed to a ConvertKit Form when they send you a contact email.
Before we begin you may find it helpful to download a pdf of the instructions, so you can easily read them while working on the integration. You can get this by quickly downloading my ConvertKit Integrations Guide.
Instructions for integrating Ninja Forms with ConvertKit.
These instructions assume:
a) In WordPress you have Ninja Forms up and running, and have an active form on your site.
b) You have signed up for a ConvertKit account.
c) In ConvertKit, you have a form set up that you wish to use, and have an incentive email active for the form.
1. Install and activate Forms: 3rd-Party Integration from the wordpress.org plugin repository.
To make the integration there's a bit of switching about to do between the Ninja Forms plugin, the 3rd Party Integration plugin and the ConvertKit website while following these instructions. So if you haven't already downloaded my pdf guide to refer to, now's a good time to do it.
On to the configuration.
2. In the Dashboard, hover over Forms and click on the new entry: 3rdparty Services.
3. In 3rdparty Services Click on [+].
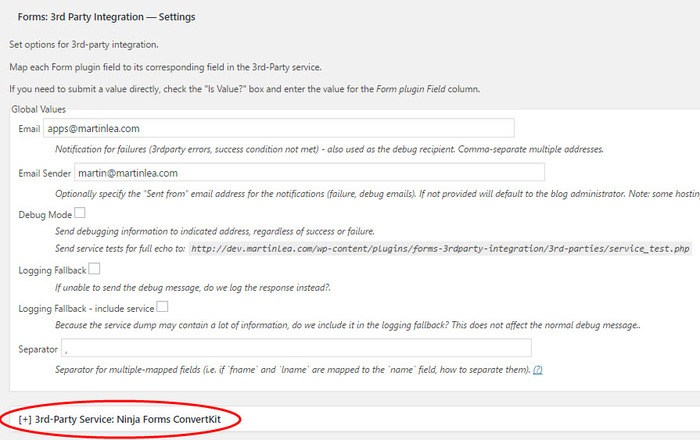
4. For Service Name enter a useful title e.g., Ninja Forms ConvertKit
5. For Submission URL paste this link:
https://app.convertkit.com/landing_pages/xxxx/subscribe
6. Now go to ConvertKit and select the form you wish to connect to. Note the landing page number for the form. You can see this in the address bar.

Change the xxxx in the above link to the landing page number for your ConvertKit form. Your Submission URL should look like this.
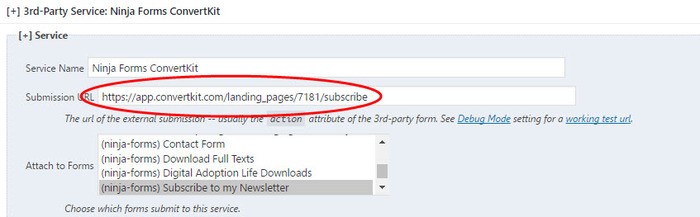
7. From the Attach to Forms drop-down menu Select the Ninja Form you wish to use.
8.Scroll down to mapping. This is where you map the Ninja Form fields to the ConvertKit form fields.
9. You can map the Ninja Form fields by their name or ID number. I find I'm less likely to make an error here if I map the field ID. ConvertKit will accept one or two fields to map to: the email field and an optional first-name field.
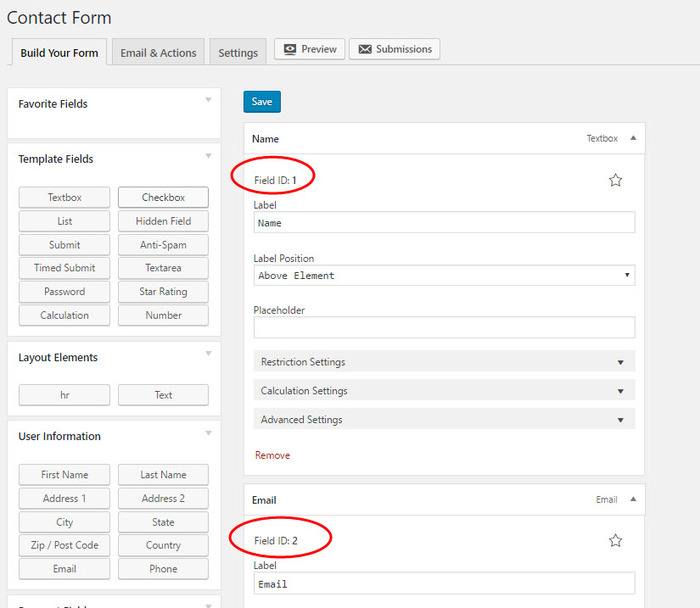
You need to go into your Ninja Form and check which form fields you're using to collect email and first name and note the ID of both. In my example Contact Form here, the name field ID=1 and the email field ID=2. If you're only collecting an email address, then obviously you only need to note the ID for that email field.
Now go back to your Ninja Form entry in the 3rdparty Integration plugin and scroll down to the mapping section.

There are three columns. The Label column is for a field name. This is for your reference only so you can put anything you like. I put “Name”. In the second Form Submission Field column I put the Ninja Form field ID for Name that I noted above: “1”. In the third column, 3rd Party Field, I put the mapped field name that ConvertKit requires: “first_name”.
Click on the little green + button on the right to create a new row of mapping fields. In the second row, I entered “Email” in the Label column. In the Form Submission Field I entered the Ninja form field ID “2”. and in the 3rd-Party Field: “email”. Note ConvertKit only recognizes “first_name” and “email” so make sure above that you've mapped the relevant Ninja Form field ids that you're using to collect first name and email to those ConvertKit field names.
10. Click Save.
That's it!
This should now work, so try sending a form. The recipient of the Ninja Form should get the email as usual, and now the sender should be subscribed to ConvertKit and get the incentive/confirmation email from ConvertKit.
Send a form then go to ConvertKit to check for a new subscription.
If it doesn't work just check the submission URL is correct, and the two field-mappings are correct.
If you're a Twitter user and you found this article useful, please tweet it so that others can find it:
How to integrate Ninja Forms with ConvertKit easily Share on XPostscript
You might be interested in an alternative to Convertkit I discovered. I've ended up moving from Mailchimp to Convertkit and now finally to MailerLite. I found it hard to justify spending an eye-watering $948 a year with Convertkit for a list of 5000 compared to just $168 for MailerLite. Mailer Lite also has a free plan for up to 1000.
Mailerlite has many of the same features as Convertkit. For example, it has a nice intuitive workflow for creating automated email series (and you can include triggers, conditional actions, and automatic segmentation). In some ways Mailerlite is a more polished solution providing more features, but without any clunky complexity.
For example, you can send simple plain emails of the kind Convertkit provide, but you also have the option to select from dozens of great functional newsletter templates. With Convertkit you quickly find yourself delving into CSS and HTML to go beyond their basic look, whereas with Mailer Lite you simply drag and drop content blocks to customize.
Play the 2-minute video below to see some of the features and the fast and easy user experience.
I ended up feeling frustrated by what I found to be too many limitations with Convertkit.
MailerLite seems to have a fast development path and is rolling out new features and improvements every month. I haven't found any email sending or deliverability problems. Mailerlite's support is also fast and effective.
MailerLite is free for up to 1,000 subscribers and only $20 per month for 5,000 (compared to $79 for Convertkit). Subscribers only count once and unsubscribes no longer count towards the fee.
Oh, and you can integrate Contact Form 7 and Ninja Forms with Mailer Lite. You can test drive MailerLite for free here.
